l html 특수문자 코드

<!DOCTYPE html>
<body>
<header>
<center>
<h1>< HTML 특수문자 ></h1>
</center>
</header>
<section>
<article>
# 풀스택 개발자를 위한 웹 프로그래밍 #
<p></p>
HTML5 & CSS3 & JavaScript & JQuery
</article>
</section>
<hr size="10" align="left" width=90% noshade="noshade"></hr>
<footer>
<small>
© 한빛아카데미
® 2017
</small>
</footer>
</body>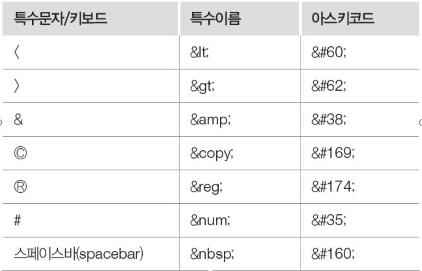
l 텍스트 태그

<!DOCTYPE html>
<body>
<header>
<center>
<h2>< 텍스트 관련 태그 ></h2>
</center>
</header>
<section>
<article>
<p><b>텍스트 볼드 처리</b></p>
<p><strong>텍스트 중요 표시</strong></p>
<p><i>텍스트를 이탤릭체로</i></p>
<p><em>텍스트 강조 표시</em></p>
<p><ins>텍스트 밑줄 처리</ins></p>
<p><del>텍스트 가운데 선 처리</del></p>
<p>텍스트<sub>아래첨자</sub>텍스트<sup>윗첨자</sup></p>
<p><mark>텍스트에 하이라이트 표시</mark></p>
</article>
</section>
</body>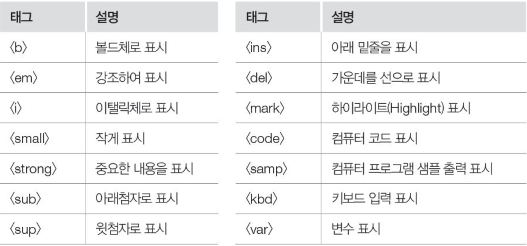
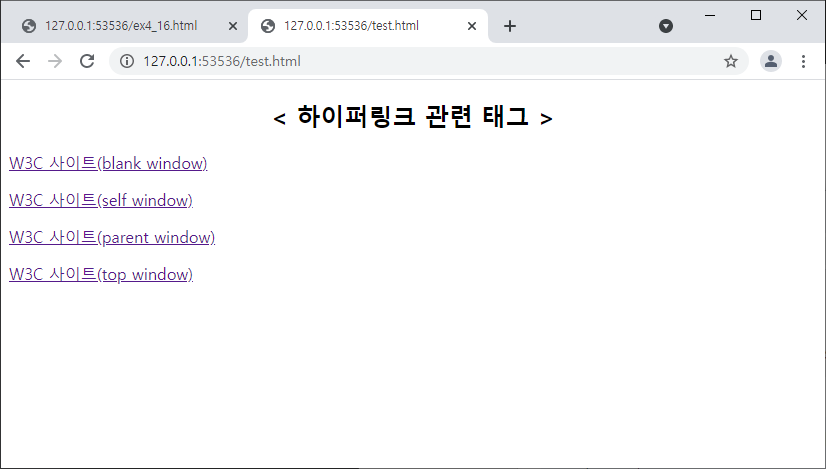
l 하이퍼링크 태그
l <a> 태그
- 다른 사이트 혹은 같은 문서 내 다른 위치로 이동할 때 사용
- href 속성값에 URL을 입력해 원하는 곳으로 이동
l 웹 사이트 간 이동
- href 속성: 연결하고자 하는 웹 사이트의 URL 지정
- target 속성: 링크를 클릭했을 때 웹 사이트가 열릴 곳 지정

<!DOCTYPE html>
<body>
<header>
<center>
<h2>< 하이퍼링크 관련 태그 ></h2>
</center>
</header>
<section>
<article>
<a href="http://www.w3.org" target="_blank">W3C 사이트(blank window)</a><p/>
<a href="http://www.w3.org" target="_self">W3C 사이트(self window)</a><p/>
<a href="http://www.w3.org" target="_parent">W3C 사이트(parent window)</a><p/>
<a href="http://www.w3.org" target="_top">W3C 사이트(top window)</a><p/>
</article>
</section>
</body>
l 하이퍼링크 베이스 태그
<head>
<title>base Tag</title>
<base href="http://www.w3.org/"/>
</head>
<body>
<header>
<center>
<h2>< 베이스 태그 사용 ></h2>
</center>
</header>
<section>
<article>
<a href="standards/" target="_blank">W3C STANDARDS</a>
<p/>
<a href="Consortium/mission.html" target="_blank">W3C MISSION</a>
<p/>
<a href="Consortium/facts.html" target="_blank">FACTS ABOUT W3C</a>
<p/>
<a href="Consortium/presskit.html" target="_blank">PRESS AND ANALYSTS</a>
<p/>
</article>
</section>
</body>l 책갈피 기능

<!DOCTYPE html>
<body>
<header>
<center>
<h2>< 책갈피 기능 ></h2>
</center>
</header>
<section>
<article>
<a href="#user">[이름]</a>
<a href="#addr">[주소]</a>
<a href="#tel">[전화번호]</a>
<a href="#foot">[참고]</a>
<p/>
</article>
</section>
<p>정보 영역</p>
...생략
<p>정보 영역</p>
<p><a name="user">홍민성</a></p>
<a href="#top">[TOP]</a>
<p>정보 영역</p>
...생략
<p>정보 영역</p>
<p><a id="addr">서울 강남구 신사동 291번지</a></p>
<a href="#top">[TOP]</a>
<p>정보 영역</p>
...생략
<p>정보 영역</p>
<p id="tel">02-2323-0909</p>
<a href="#top">[TOP]</a>
<p>정보 영역</p>
...생략
<p>정보 영역</p>
</body>
l 이메일 보내기
l 이메일 링크
- <a> 태그의 href 속성값에 이메일 주소 작성
<a href=“mailto:이메일 주소">내용</a>


<!DOCTYPE html>
<body>
<header>
<center>
<h2>< 이메일 보내기 ></h2>
</center>
</header>
<a href="mailto:gosyhong@gmail.com">받는 사람</a><br />
<a href="mailto:gosyhong@gmail.com?subject=질문 있어요">받는 사람, 제목</a><br>
<a href="mailto:gosyhong@gmail.com?cc=haejini.chung@gmail.com&bcc=gooheekoo@gmail.com">받는 사람, 참조, 숨은 참
조</a><br>
<a href="mailto:gosyhong@gmail.com?cc=haejini.chung@gmail.com&bcc=gooheekoo@gmail.com&subject=질문 있어요&body=
웹 프로그래밍">받는 사람, 참조, 숨은 참조, 제목, 본문</a><br>
<a href="mailto:gosyhong@gmail.com?body=Line1-text%0D%0ALine2-text">받는 사람, 본문 문단</a>
</body>
l 무순서, 순서, 정의형 목록
ol = 리스트가 있다.
ul = 리스트가 없다.
il = ul, ol 안의 목록
dt = 리스트 정의
dd = 리스트의 목록
l 무순서 목록
- 순서가 없는 목록
- <ul> 태그 사용, 각 항목은 <li> 태그로 입력
- 목록의 각 항목 앞에는 불릿(bullet)이 붙음
-
l 순서 목록
- 순서가 있는 목록
- <ol> 태그 사용, 각 항목은 <li> 태그로 입력
- 목록의 각 항목에는 기본값으로 type=“1”이 적용
-
l 정의형 목록
- 각 항목을 정의하기 위한 목록
- <dl> 태그 사용
- 정의한 각 항목은 <dt>태그를, 각 항목에 대한 설명은 <dd> 태그를 사용

<!DOCTYPE html>
<body>
    <!-- 무순서 목록 -->
    <section>
        <article>
            <h2>무순서 목록</h2>
            <ul>
                <li>Coffee</li>
                <li>Tea
                    <ul>
                        <li>Black tea</li>
                        <li>Green tea</li>
                    </ul>
                </li>
                <li>Milk</li>
            </ul>
        </article>
    </section>
    <!-- 순서 목록 -->
    <section>
        <article>
            <h2>순서 목록</h2>
            <ol>
                <li>Apples</li>
                <li>Bananas</li>
                <li>Lemons</li>
                <li>Oranges</li>
            </ol>
        </article>
    </section>
    <!-- 정의형 목록 -->
    <section>
        <article>
            <h2>정의형 목록</h2>
            <dl>
                <dt>첫 번째 아이템</dt>
                    <dd>- HTML5</dd>
                <dt>두 번째 아이템</dt>
                    <dd>- CSS3</dd>
                <dt>세 번째 아이템</dt>
                    <dd>- JavaScript</dd>
            </dl>
        </article>
    </section>
</body>
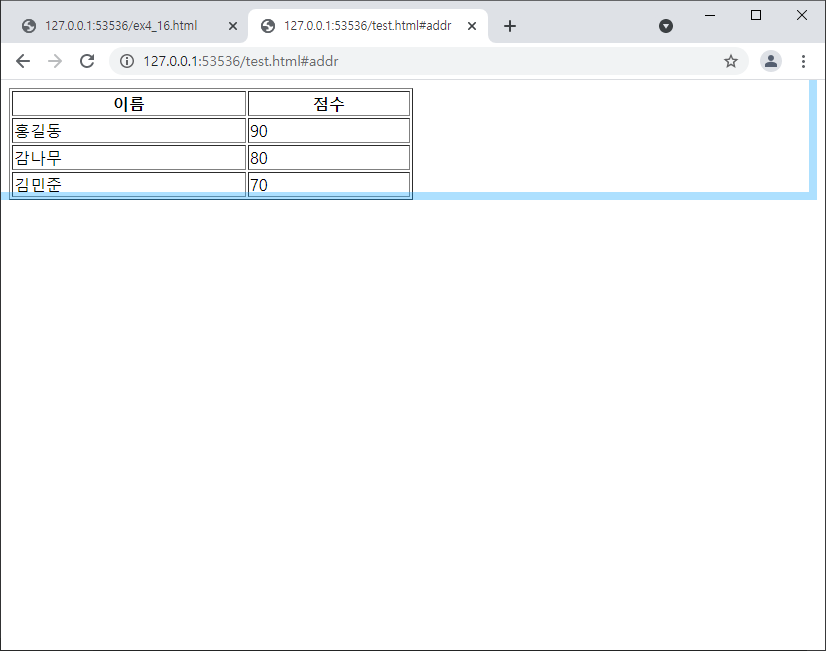
l table 태그
- <tr> 태그 : 행 생성, <td> 태그 : 열 생성
- <th> 태그 : 표의 머리를 정의, 셀 제목 글자를 강조하는 역할
<!DOCTYPE html>
<body>
    <section>
        <article>
            <table border="1" style="width:50%">
                <tr>
                    <th>이름</th>
                    <th>점수</th>
                </tr>
                <tr>
                    <td>홍길동</td>
                    <td>90</td>
                </tr>
                <tr>
                    <td>감나무</td>
                    <td>80</td>
                </tr>
                <tr>
                    <td>김민준</td>
                    <td>70</td>
                </tr>
            </table>
        </article>
    </section>
</body>
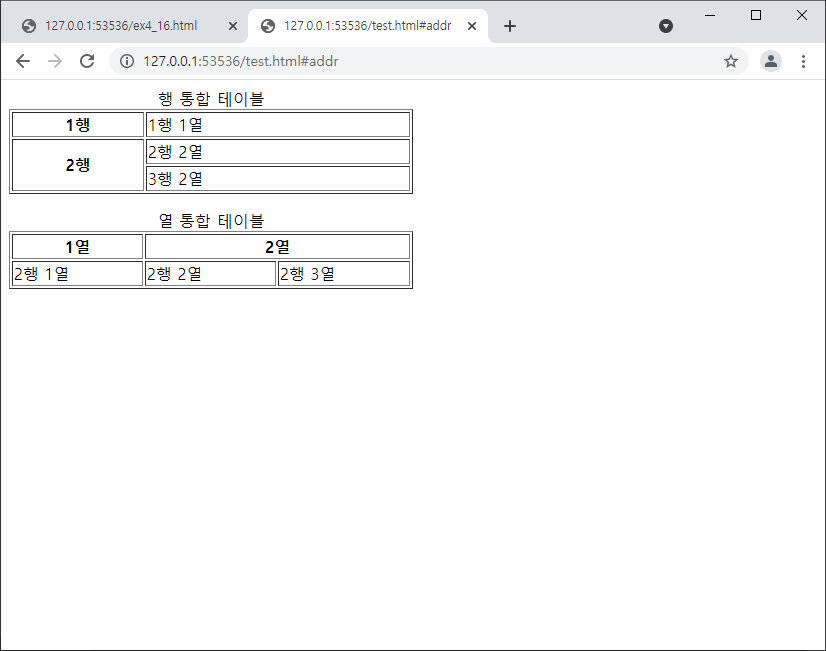
l table 병합
표 제목 삽입
- <caption> 태그 사용
셀 병합
- rowspan : 셀을 세로로 병합, 속성값으로 병합하고 싶은 행의 수만큼 지정
- colspan : 셀을 가로로 병합, 속성값으로 병합하고 싶은 열의 수만큼 지정
<!DOCTYPE html>
<body>
<section>
<article>
<table border="1" style="width:50%">
<caption>행 통합 테이블</caption>
<tr>
<th>1행</th>
<td>1행 1열</td>
</tr>
<tr>
<th rowspan="2">2행</th>
<td>2행 2열</td>
</tr>
<tr>
<td>3행 2열</td>
</tr>
</table>
</article>
</section>
<p></p>
<section>
<article>
<table border="1" style="width:50%">
<caption>열 통합 테이블</caption>
<tr>
<th>1열</th>
<th colspan="2">2열</th>
</tr>
<tr>
<td>2행 1열</td>
<td>2행 2열</td>
<td>2행 3열</td>
</tr>
</table>
</article>
</section>
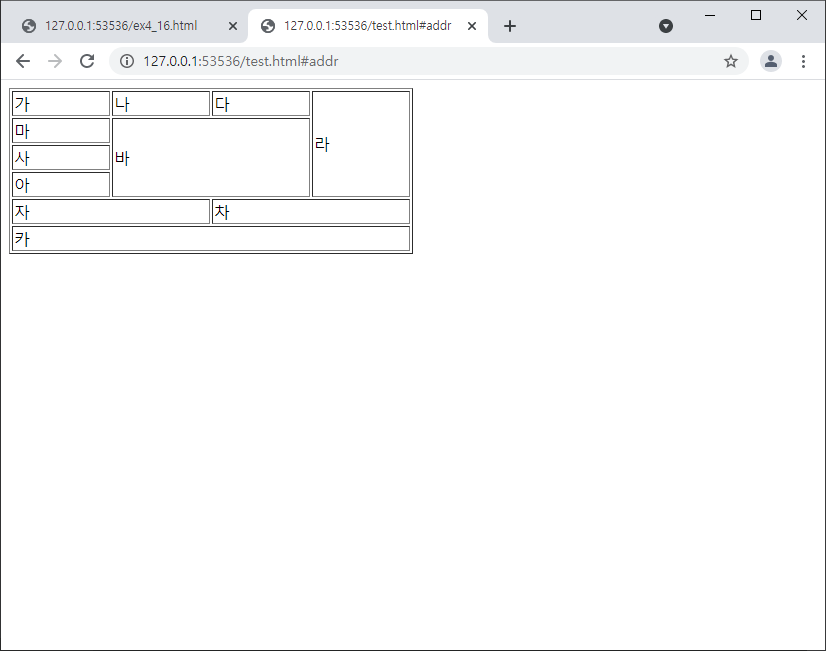
</body>l table 병합 2
<!DOCTYPE html>
<body>
    <section>
        <article>
            <table border="1" style="width:50%">
                <tr>
                    <td>가</td>
                    <td>나</td>
                    <td>다</td>
                    <td rowspan="4">라</td>
                </tr>
                <tr>
                    <td>마</td>
                    <td colspan="2" rowspan="3">바</td>
                </tr>
                <tr>
                    <td>사</td>
                </tr>
                <tr>
                    <td>아</td>
                </tr>
                <tr>
                    <td colspan="2">자</td>
                    <td colspan="2">차</td>
                </tr>
                <tr>
                    <td colspan="4">카</td>
                </tr>
            </table>
        </article>
    </section>
</body>
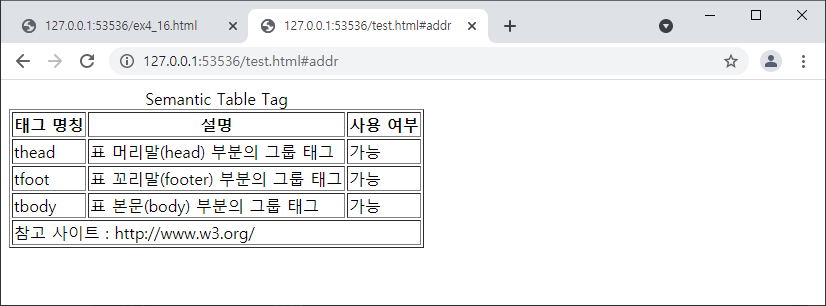
l table 시멘틱 태그
- <thead> : 표 머리말(head) 부분의 그룹 태그
- <tbody> : 표 본문(body) 부분의 그룹 태그
- <tfoot> : 표 꼬리말(Footer) 부분의 그룹 태그
<!DOCTYPE html>
<body>
    <section>
        <article>
            <table border="1" summary="시맨틱 테이블 관련 요소 목록">
                <caption>Semantic Table Tag</caption>
                <thead>
                    <tr>
                        <th>태그 명칭</th>
                        <th>설명</th>
                        <th>사용 여부</th>
                    </tr>
                 </thead>
                 <tfoot>
                    <tr>
                        <td colspan="3">참고 사이트 : http://www.w3.org/ </td>
                    </tr>
                 </tfoot>
            <tbody>
                <tr>
                     <td>thead</td>
                     <td>표 머리말(head) 부분의 그룹 태그</td>
                     <td>가능</td>
                 </tr>
                 <tr>
                     <td>tfoot</td>
                     <td>표 꼬리말(footer) 부분의 그룹 태그</td>
                     <td>가능</td>
                 </tr>
                 <tr>
                     <td>tbody</td>
                     <td>표 본문(body) 부분의 그룹 태그</td>
                     <td>가능</td>
                 </tr>
            </tbody>
        </table>
    </article>
</section>
</body
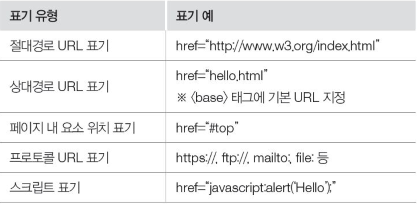
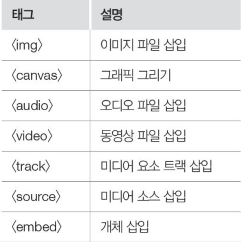
l 이미지 삽입
<img> 태그 속성
- src : 이미지 파일이 저장된 경로 지정
- alt : 이미지를 웹 브라우저에서 표시하지 못했을 경우 표시되는 대체 텍스트 지정
- width/height : 이미지의 가로, 세로 길이를 픽셀 단위로 지정(% 단위를 사용하면 웹 브라우저의 크기에 따라 이미지 크기가 조절되도록 지정할 수 있음)
- style : 이미지의 스타일(크기, 위치 등)을 픽셀 단위로 지정
- border : 이미지 경계선의 두께를 픽셀 단위로 지정
<!DOCTYPE html>
<body>
    <h3>이미지 기본 표현</h3>
    <img src="html.bmp" alt="이미지가 표시되지 않습니다.">
    <h3>이미지에 설명 추가 & 오른쪽 정렬</h3>
    <img src="html.bmp" title="HTML5 로고 이미지" style="float:right">
    <h3>이미지의 크기를 픽셀 단위로 조정</h3>
    <img src="html.bmp" style="width:50px;height:60px">
    <h3>이미지의 크기를 % 단위로 조정</h3>
    <img src="html.bmp" width=50% height=40%>
</body>
l 이미지에 링크걸기

<!DOCTYPE html>
<body>
    <h3>이미지를 클릭하세요</h3>
    <a href="http://www.w3.org" target="_blank"><img src="html.bmp" alt="HTML5 Logo" title="W3C 홈페이지로 이동" border="2" style="width: 100px; height: 100px"></a>
    <a href="http://cafe.naver.com/go2web" target="_blank"><img src="wait.jpg" alt="go2web site" title="저자 홈페이지로 이동" border="2" style="width: 100px; height: 100px"></a>
    <a href="http://en.wikipedia.org/wiki/Isaac_Newton" target="_blank"><img src="newton.gif" alt="nweton site" title="뉴턴 홈페이지로 이동" border="2" style="width: 170px; height: 100px"> </a>
</body>
l 이미지에 제목 추가하기

<!DOCTYPE html>
<body>
    <h3>이미지에 제목 추가하기</h3>
    <figure>
        <img src="html.bmp" alt="HTML5 Logo" title="W3C 홈페이지">
        <figcaption>[그림1] HTML5</figcaption>
    </figure>
    <figure>
        <figcaption>[그림2] Google</figcaption>
        <img src="wait.jpg" alt="google site" title="구글 크롬">
    </figure>
</body>
l 오디오 입력
<audio> 태그 속성
- src : 재생할 오디오 파일이 저장된 경로 표시
- controls : 재생 제어기 표시
- loop : 반복 재생
- autoplay : 웹 문서가 열림과 동시에 자동으로 재생
- muted : 음소거 상태로 시작
- preload : 오디오 파일 사용 여부와 상관없이 미리 다운로드함
<source> 태그
- 여러 형식의 오디오 파일을 동시에 제공할 때 사용
- 적합한 형식의 오디오 파일을 찾아서 실행시키려고 할때 사용
- 재생에 적합한 파일이 없다면 마지막 문장 출력

<!DOCTYPE html>
<body>
    <h3>오디오 자동 재생</h3>
    <audio src="bear.mp3" controls loop autoplay></audio>
    <h3>오디오 수동 재생</h3>
    <audio src="bear.mp3" controls></audio>
    <h3>오디오 다중 재생</h3>
    <audio controls>
        <source src="bear.mp3" type="audio/mpeg">
        <source src="bear.ogg" type="audio/ogg">
        <source src="bear.wav" type="audio/wav">
        오디오 파일을 재생할 수 없습니다.
    </audio>
</body>
l 비디오
l <video> 태그 사용
- 비디오 파일을 웹 문서에 삽입할 때 사용
- <source> 태그로 여러 가지의 비디오 파일을 동시에 제공
-
l <video> 태그 속성
- src : 재생할 비디오 파일이 저장된 경로 표시
- controls : 재생 제어기 표시
- width, height : 비디오의 가로/세로 크기 설정
- loop : 반복 재생
- autoplay : 웹 문서가 열림과 동시에 자동 재생
- muted : 음소거 상태로 시작
- preload : 비디오 파일을 사용 여부와 상관없이 미리 다운로드함
- poster : 비디오 파일이 재생되기 전이나 다운로드되지 않고 있는 경우 표시될 이미지의 URL을 표시
<!DOCTYPE html>
<body>
    <h3>비디오 자동 재생</h3>
    <video src="bear.mp4" controls loop autoplay width="300" height="250"></video>
    <h3>비디오 수동 재생</h3>
    <video src="bear.mp4" controls width="300" height="250"></video>
    <h3>비디오 다중재생-비디오 파일이 현재 폴더에 있는 경우</h3>
    <video controls autoplay width="300" height="250">
        <source src="small.webm" type="video/webm">
        <source src="small.mp4" type="video/mpeg">
        <source src="small.ogv" type="video/ogg">
        비디오 파일을 재생할 수 없습니다.
    </video>
    <h3>비디오 다중 재생-비디오 파일이 웹 사이트에 있는 경우</h3>
    <video controls autoplay width="300" height="250" poster="wait.jpg">
        <source src="http://media.w3.org/2010/05/sintel/trailer.mp4"
                type='video/mp4; codecs="avc1, mp4a"'>
        <source src="http://media.w3.org/2010/05/sintel/trailer.ogv"
                type='video/ogg; codecs="theora, vorbis"'>
        비디오 파일을 재생할 수 없습니다.


    </video>
</body>
l 개체삽입
l 개체 삽입 태그
- 이미지, 오디오, 비디오, 태그로 지원하지 않는 파일을 웹 문서에 포함하기 위해 사용
- <object> 태그와 <embed> 태그가 있음
l <embed> 태그 사용 방법

l <object> 태그 사용 방법


<!DOCTYPE html>
<body>
<h1>embed 태그 사용</h1>
<h3>이미지 파일 삽입</h3>
<embed src="html.bmp" width="150" height="170">
<h3>플래시 파일 삽입</h3>
<embed src="object.swf">
<h3>웹 문서 삽입</h3>
<embed src="http://www.hanbit.co.kr" width="500" height="500">
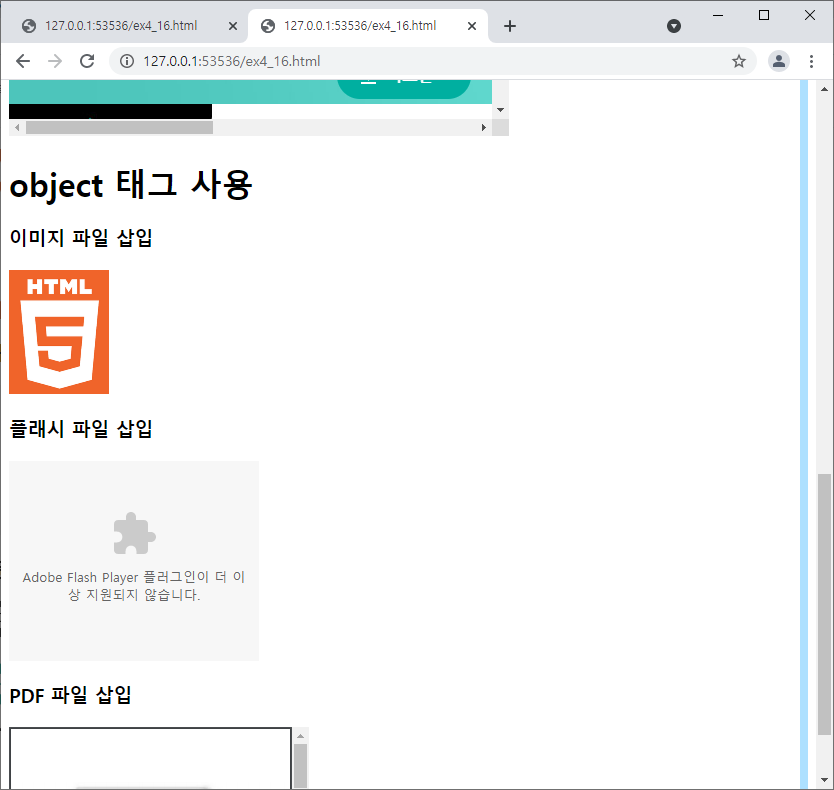
<h1>object 태그 사용</h1>
<h3>이미지 파일 삽입</h3>
<object data="html.bmp"></object>
<h3>플래시 파일 삽입</h3>
<object type="application/x-shockwave-flash" data="object.swf" width="250" height="200 "></object>
<h3>PDF 파일 삽입</h3>
<object type="application/pdf" data="pdflogo.pdf"></object>
</body>'Html5' 카테고리의 다른 글
| 글자수 제한 (0) | 2022.01.18 |
|---|---|
| onclick에 target 걸기 (0) | 2021.08.15 |
| 공간 분할 태그 (0) | 2021.05.04 |
| html 입력 양식 태그 <form> (0) | 2021.05.03 |