728x90
반응형
Okhttp 란?
java, android 에서 사용되는 애플리케이션 네트워크 방식
HTTP 를 효율적으로 수행하면 항목을 더 빠르게 로드하고 대역폭을 절약할 수 있다.
- HTTP/2 지원을 통해 동일한 호스트에 대한 모든 요청이 소켓을 공유할 수 있다.
- 연결 풀링은 요청 대기 시간을 줄인다. (HTTP/2 를 사용할 수 없는 경우)
- 투명 GZIP은 다운로드 크기를 줄인다.
- 응답 캐싱은 반복 요청에 대해 네트워크를 완전히 피한다.
라이브러리 Okhttp
<!-- okhttp -->
<dependency>
    <groupId>com.squareup.okhttp3</groupId>
    <artifactId>okhttp</artifactId>
    <version>4.9.1</version>
</dependency>
라이브러리 hamcrest
<!--    hamcrest JUnit 테스트 표현식 작성시 문맥적으로 자연스럽고 우아한 문장을 만들 수 있도록 도와줌   -->

<dependency>
    <groupId>org.hamcrest</groupId>
    <artifactId>hamcrest</artifactId>
    <version>2.2</version>
    <scope>test</scope>
</dependency>
용법 예제
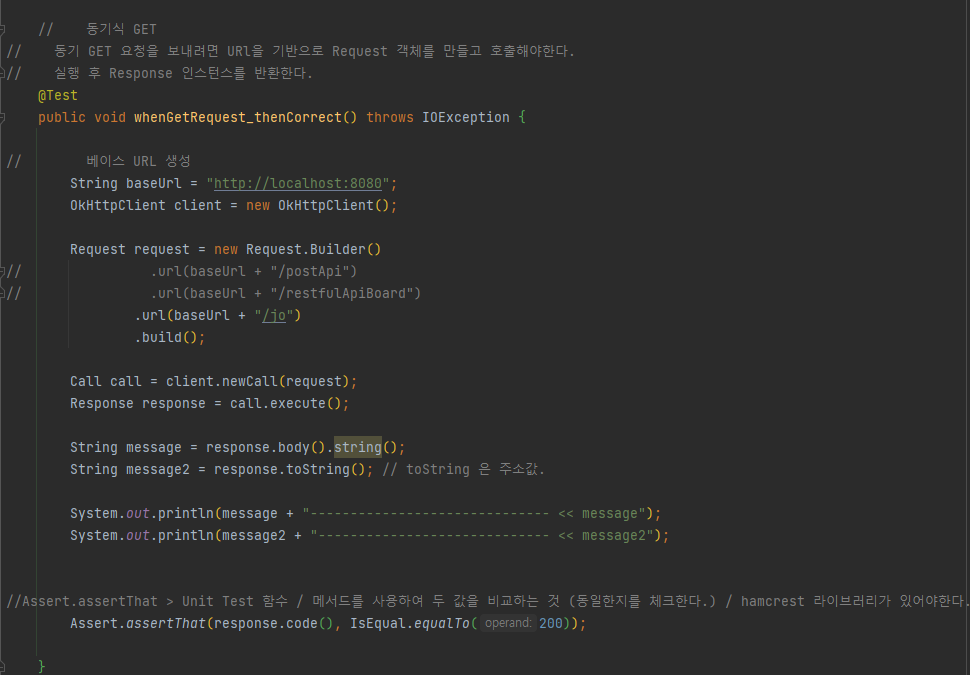
동기식 GET
- 동기 GET 요청을 보내려면 URL을 기반으로 Request 객체를 만들고 호출해야한다.
- 실행 후 Response 인스턴스를 반환
JUnit 으로 TEST를 해보자.
TEST 시 코드가 0 이 출력되면 코드에 문제가 없는 것이고, -1 이 등장하면 에러가 있는 것
사이에 코드를 보고 싶다면 디버깅을 하거나 로그에 출력하게 만들자.
BASE URL 을 설정해주고 나머지 요청 받을 페이지를 빌드한다.
//Assert.assertThat >
Unit Test 함수 / 메서드를 사용하여 두 값을 비교하는 것 (동일한지를 체크한다.) /
hamcrest 라이브러리가 있어야한다.
    @Test
    public void whenGetRequest_thenCorrect() throws IOException {

//        베이스 URL 생성
        String baseUrl = "http://localhost:8080";
        OkHttpClient client = new OkHttpClient();

        Request request = new Request.Builder()
//                .url(baseUrl + "/postApi")
//                .url(baseUrl + "/restfulApiBoard")
                .url(baseUrl + "/jo")
                .build();

        Call call = client.newCall(request);
        Response response = call.execute();

        String message = response.body().string();
        String message2 = response.toString(); // toString 은 주소값.

        System.out.println(message + "------------------------------ << message");
        System.out.println(message2 + "----------------------------- << message2");


//Assert.assertThat > Unit Test 함수 / 메서드를 사용하여 두 값을 비교하는 것 (동일한지를 체크한다.) / hamcrest 라이브러리가 있어야한다.
        Assert.assertThat(response.code(), IsEqual.equalTo(200));

    }
비동기 GET
- 비동기 GET 을 만들려면 Call 을 큐에 넣어야한다.
- Callback 이 읽을 때 응답을 읽을 수 있게 해주는데, 응답 헤더가 준비된 후에 발생한다.
- 응답 본문 읽기가 여전히 차단될 수 있다. Okhttp는 현재 부분적으로 응답 본문을 수신하는 비동기 API 를 제공하지 않는다. >> 아마 파싱을 말하는거 같음 >> Jackson, gson 라이브러리를 사용하자
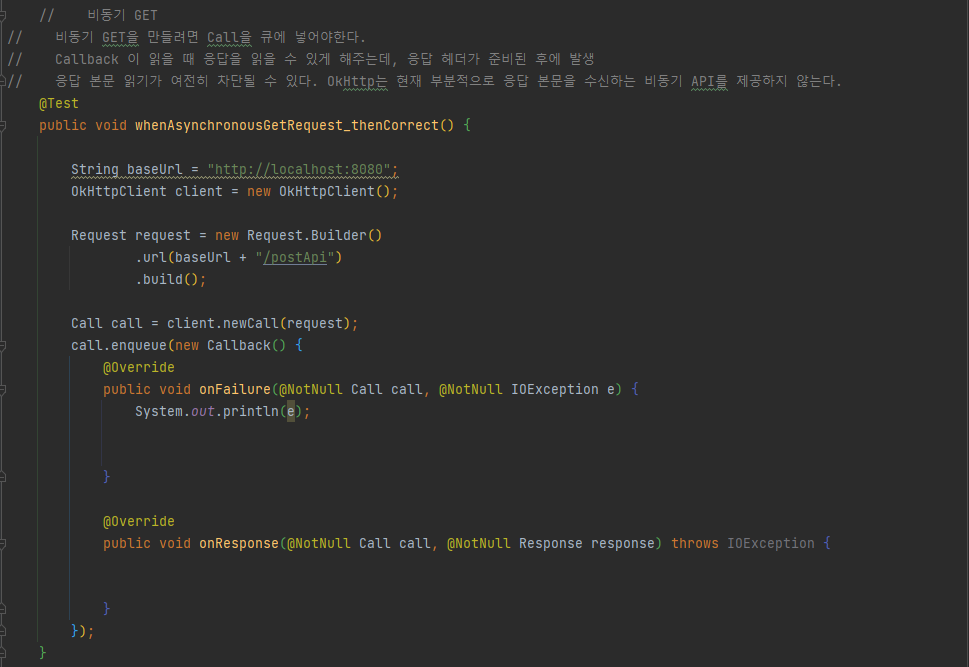
    @Test
    public void whenAsynchronousGetRequest_thenCorrect() {

        String baseUrl = "http://localhost:8080";
        OkHttpClient client = new OkHttpClient();

        Request request = new Request.Builder()
                .url(baseUrl + "/postApi")
                .build();

        Call call = client.newCall(request);
        call.enqueue(new Callback() {
            @Override
            public void onFailure(@NotNull Call call, @NotNull IOException e) {
                System.out.println(e);


            }

            @Override
            public void onResponse(@NotNull Call call, @NotNull Response response) throws IOException {


            }
        });
    }
쿼리 매개변수로 GET
- GET 요청에 쿼리 매개변수를 추가하기 위해 HttpUrl.Builder 를 활용할 수 있다.
- URL 이 빌드된 후 요청개체에 전달 할 수 있다.
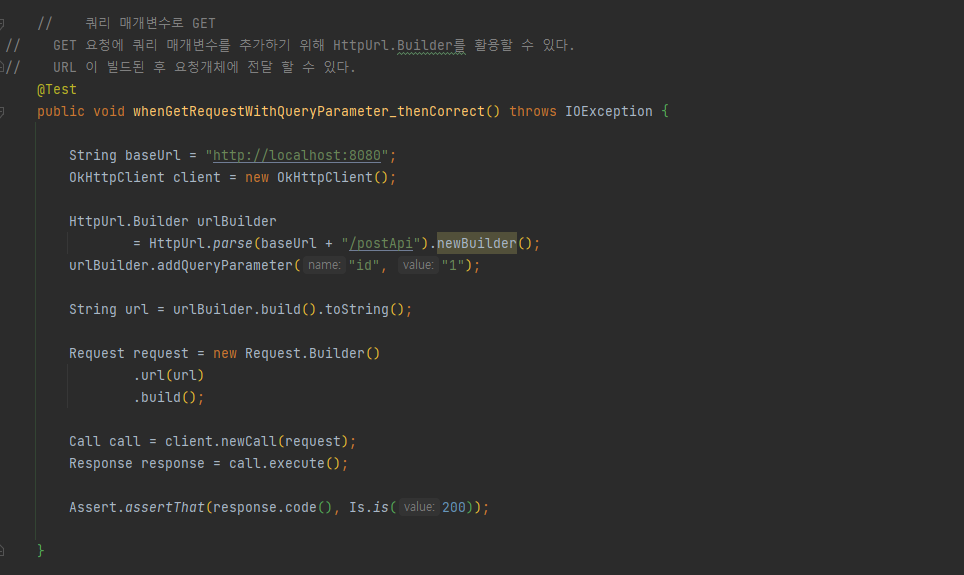
    @Test
    public void whenGetRequestWithQueryParameter_thenCorrect() throws IOException {

        String baseUrl = "http://localhost:8080";
        OkHttpClient client = new OkHttpClient();

        HttpUrl.Builder urlBuilder
                = HttpUrl.parse(baseUrl + "/postApi").newBuilder();
        urlBuilder.addQueryParameter("id", "1");

        String url = urlBuilder.build().toString();

        Request request = new Request.Builder()
                .url(url)
                .build();

        Call call = client.newCall(request);
        Response response = call.execute();

        Assert.assertThat(response.code(), Is.is(200));

    }
POST 요청
- "username", "password" 매개변수를 보내기 위해 RequsetBody 를 빌드하는 간단한 POST 요청방식

 @Test
    public void whenSendPostRequest_thenCorrect() throws IOException {

        String baseUrl = "http://localhost:8080";
        OkHttpClient client = new OkHttpClient();

        RequestBody formBody = new FormBody.Builder()
                .add("username", "test")
                .add("password", "test")
                .build();

        Request request = new Request.Builder()
                .url(baseUrl + "/postApi")
                .post(formBody)
                .build();

        Call call = client.newCall(request);
        Response response = call.execute();

        Assert.assertThat(response.code(), Is.is(200));
    }
파일 업로드
- MultipartBody.Builder 를 사용하여 "test.txt" 파일을 업로드 해보자

    @Test
    public void whenUploadFile_thenCorrect() throws IOException {

        String baseUrl = "http://localhost:8080";
        OkHttpClient client = new OkHttpClient();

        RequestBody requestBody = new MultipartBody.Builder()
                .setType(MultipartBody.FORM)
                .addFormDataPart("file", "file.txt",
                        RequestBody.create(MediaType.parse("application/octet-stream"),
                                new File("/WEB-INF/test/test.txt")))
                .build();

        Request request = new Request.Builder()
                .url(baseUrl + "/users/upload")
                .post(requestBody)
                .build();

        Call call = client.newCall(request);
        Response response = call.execute();

        Assert.assertThat(response.code(), Is.is(200));


    }
요청에 헤더 설정
- 요청에 사용자 정의 헤더를 설정하려면 간단한 addHeader 호출을 사용할 수 있다.

@Test
public void whenSetHeader_thenCorrect() throws IOException {

    String SampleUrl = "http://localhost:8080/postApi";
    OkHttpClient client = new OkHttpClient();

    Request request = new Request.Builder()
            .url(SampleUrl)
            .addHeader("Content-Type", "application/json")
            .build();

    Call call = client.newCall(request);
    Response response = call.execute();
    response.close();

}
기본 헤더 설정
모든 요청에 대해 기본 헤더를 설정하는 대신 클라이언트 자체에서 기본 헤더를 구성하는 방법
ex. 모든 요청에 대해 "application/json" 콘텐츠 유형을 설정하려면 클라이언트에 대한 인터셉터를 설정해야 하는데, 그방법
---> 실패해서 고치는중 ㅠㅠ
TimeOut
- 연결할 수 없는 경우 시간 초과를 사용하여 호출에 실패한다.
- 네트워크 오류는 클라이언트 연결 문제, 서버 가용성 문제 또는 그 사이의 모든 문제로 발생할 수 있다.
- Okhttp는 연결, 읽기 및 쓰기 제한 시간을 지원한다.
- 아래 예에서는 1초의 readTimeOut 으로 클라이언트를 구축 하고, URL은 2초의 지연시간을 가지게 설정함
- 클라이언트 시간 초과가 리소스 응답 시간보다 낮기 때문에 테스트가 실패한다.
근데 왜 실패 안함? 문제가 있나봄;;


    @Test
    public void whenSetRequestTimeout_thenFail() throws IOException {

        String baseUrl = "http://localhost:8080/postApi";

        OkHttpClient client = new OkHttpClient.Builder()
//                .connectTimeout(10, TimeUnit.SECONDS)   // connect timeout
//                .writeTimeout(10, TimeUnit.SECONDS)
                .readTimeout(1, TimeUnit.SECONDS)   // socket timeout
                .build();

        Request request = new Request.Builder()
                .url(baseUrl)
                .build();

        Call call = client.newCall(request);
        Response response = call.execute();

        Assert.assertThat(response.code(), Is.is(200));

    }
호출 취소
참고 사이트
https://www.baeldung.com/guide-to-okhttp
728x90
반응형
'RESTful API' 카테고리의 다른 글
| 2개의 server 이용, JSON 주고 받기(DB) (0) | 2021.12.14 |
|---|---|
| JSON 데이터 예쁘게 보는 사이트 (0) | 2021.12.09 |
| JSON 데이터를 가져오기 (0) | 2021.12.09 |
| 빈즈를 생성할수 없다는 식의 에러 내용 (0) | 2021.12.07 |
| gson 라이브러리 (0) | 2021.12.07 |
| 마샬링, 언마샬링 공부중 (0) | 2021.12.07 |